
GIMP
News
Docs
Tutorials
More
Text and images Copyright (C) 2002 Eric R. Jeschke and may not be used without permission of the author.
Thanks to Branko Collin for bringing to my attention Simon Budig’s “warp sharp” script. This is a Script-Fu script that you can put in your GIMP folder and run straight from GIMP. This is a very impressive script and a nice tool to have in your GIMP toolbox.
I haven’t yet had a chance to experiment with it too much beyond the default settings, but I have tried it on a couple of the images used in my full smart sharpening tutorial. Here are the results:
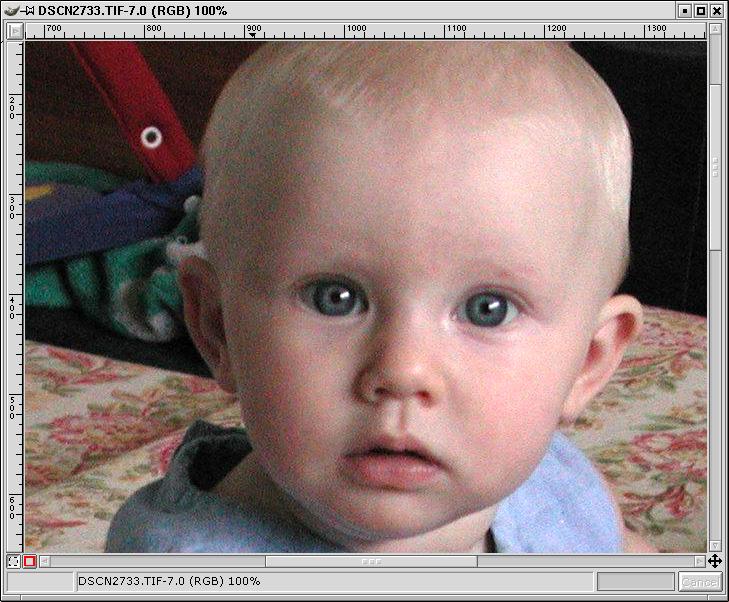
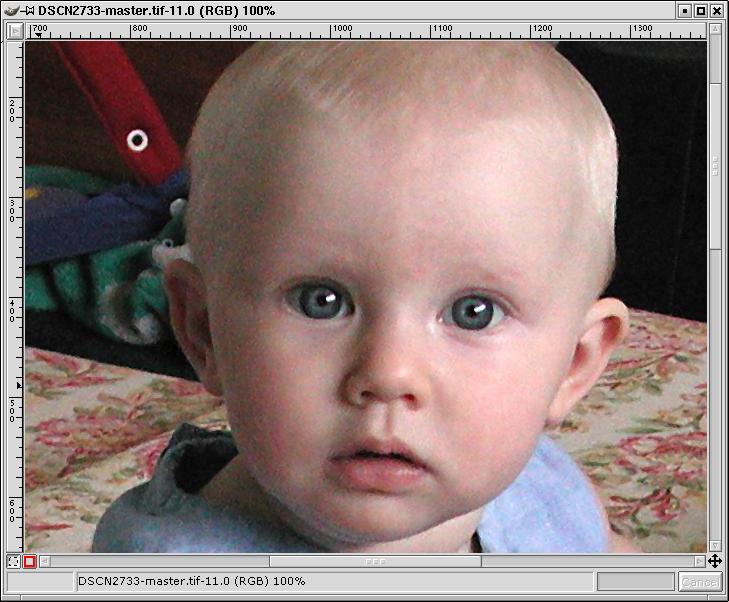
1. Original image, zoomed 100%.
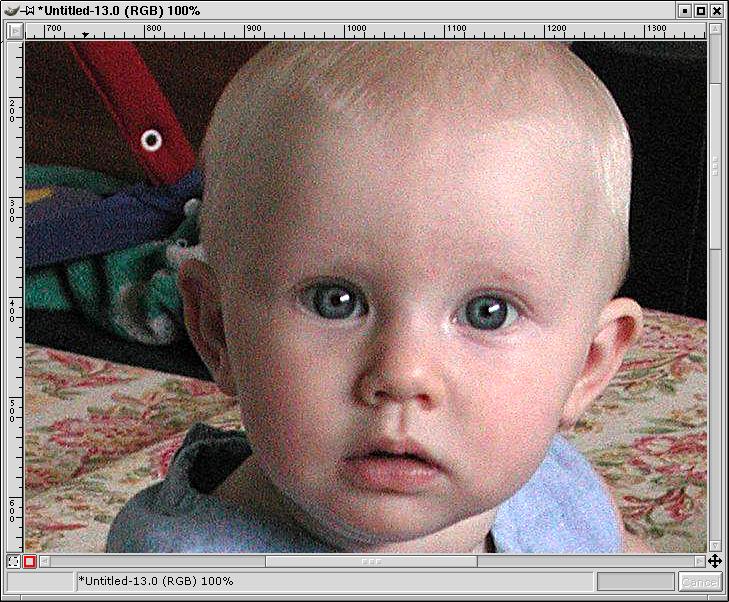
2. Standard unsharp mask filter, all RGB channels.
(Radius=1, Amount=1.0, Threshold=0) Yuk. This is why you want to smart sharpen.
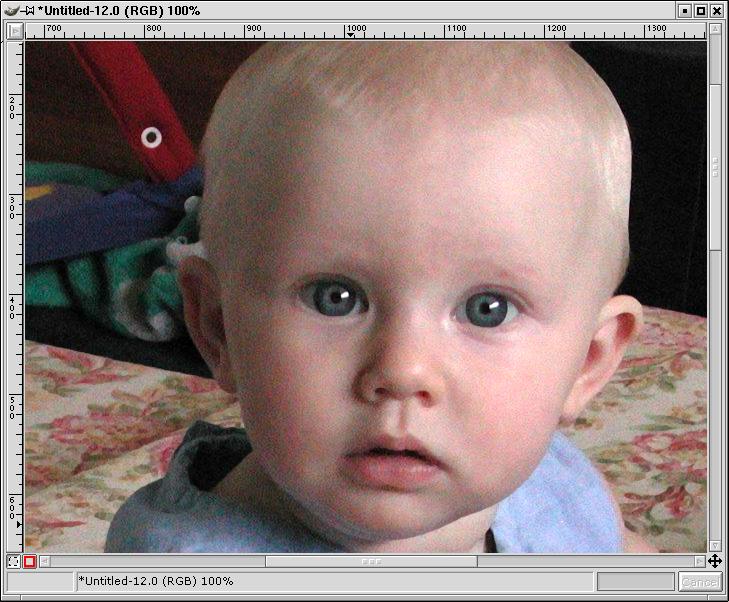
3. Warp sharp script, all RGB channels.
(default parameters: Edge detection=7.0, Blur radius=3.0, Bump depth=2, Displace intensity=2.5)
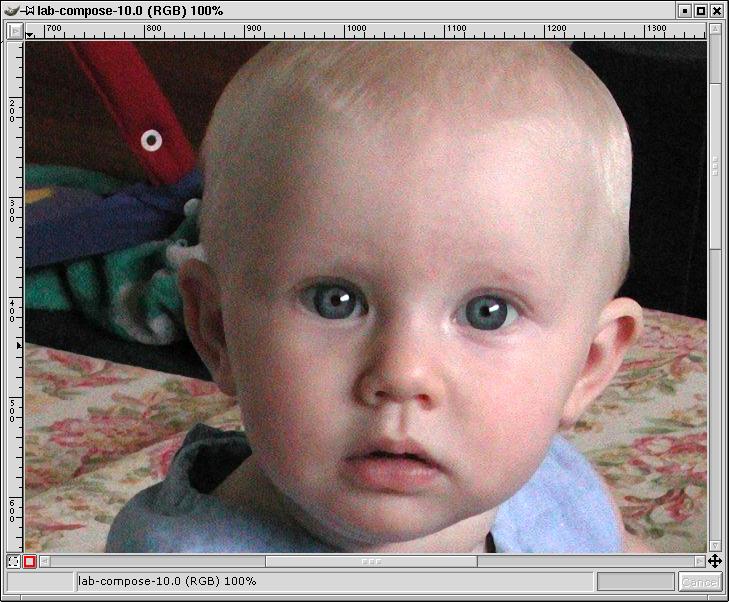
4. Warp sharp script, luminosity channel only.
(default parameters: Edge detection=7.0, Blur radius=3.0, Bump depth=2, Displace intensity=2.5)
I don’t see much difference between this and #3. I wouldn’t really expect to, since the warp sharp script appears to operate on edges only. I did find that the edges are not as “squeezed” here—they are slightly ragged, more like the other, non-warp sharpening techniques. See the discussion below for more on this.
5. Smart sharpened (edges, luminosity channel only).
The full technique from the tutorial.
I think this one still has less noise, or at least the noise is more “smoothed out” and less objectionable than in #4.
Warp sharp script, luminosity channel only (same as #4—unzoomed).
Here the difference is more visible and striking. Compare to below.

Smart sharpened (edges, luminosity channel only; same as #5—unzoomed).
To my eye this one is definitely better. Notice the arm, the face and the white wall in the upper left and compare to above.
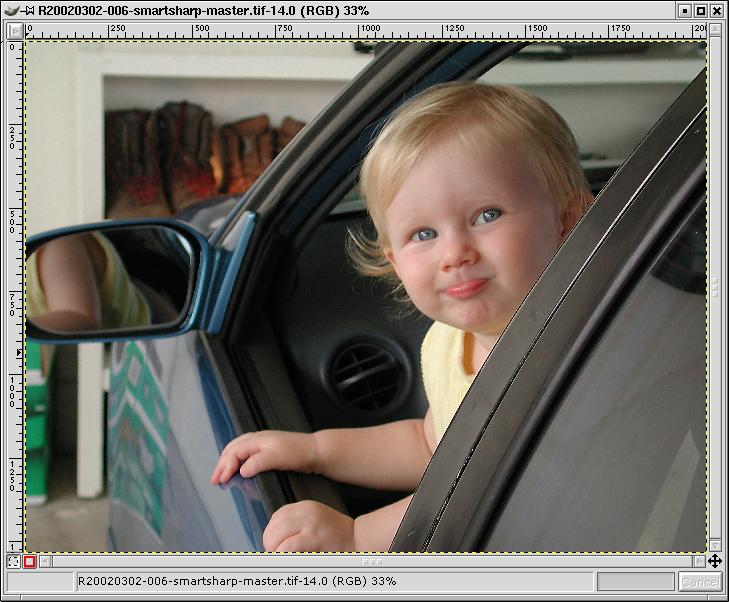
Here’s the main test image from the tutorial:
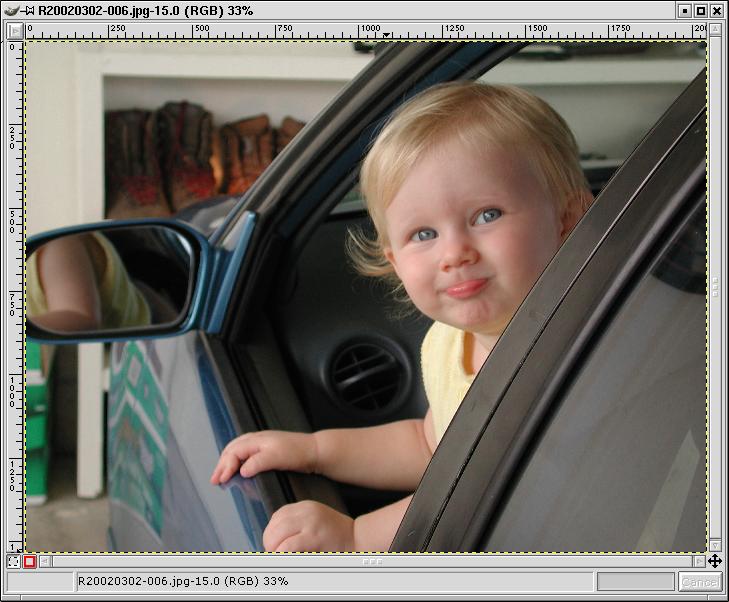
1. Original image.
Examine the seam between the driver’s window frame and the rear window frame.
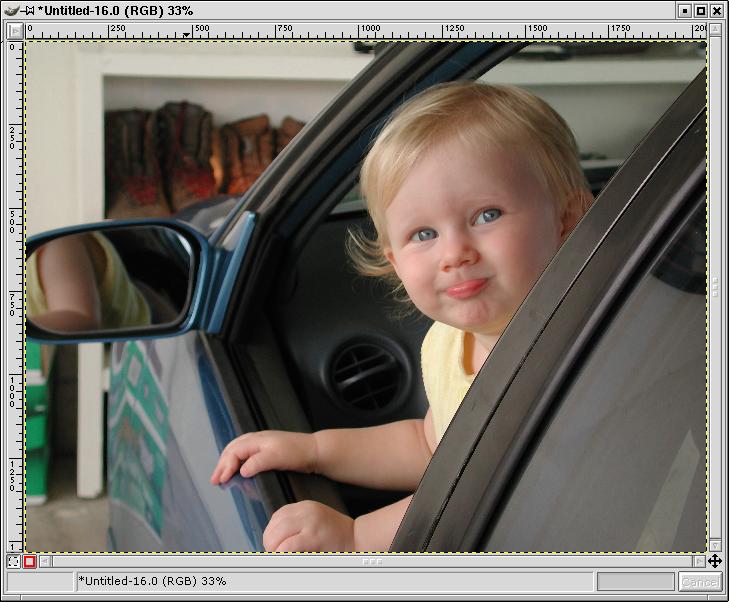
2. Warp sharpened.
(default parameters: Edge detection=7.0, Blur radius=3.0, Bump depth=2, Displace intensity=2.5) Compare the seam to the above image. Very similar.
3. Smart sharpened (edges, luminosity channel only).
Note how the seam contrast is exaggerated, along with every nick and cut along the seam.
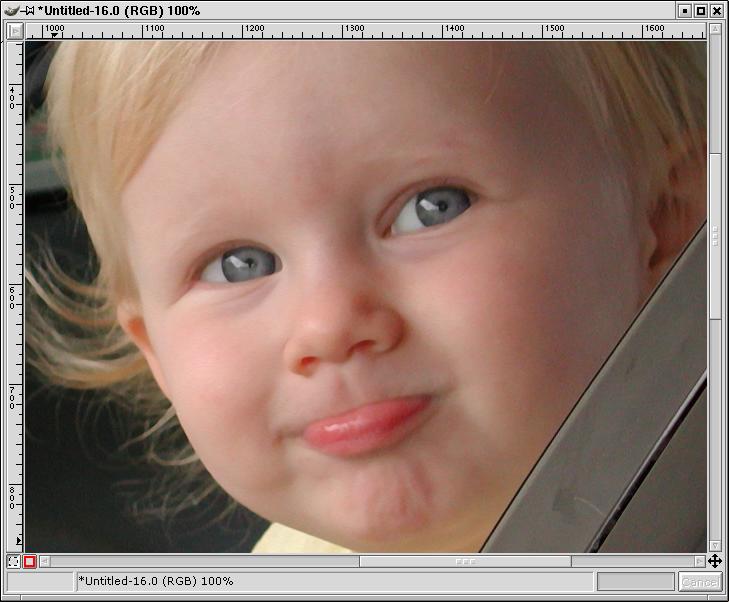
Warp sharpened, zoomed to 100%.
Examine the catchlight in the eyes, the edge of the iris, and the edge of the cheek/chin on the left.
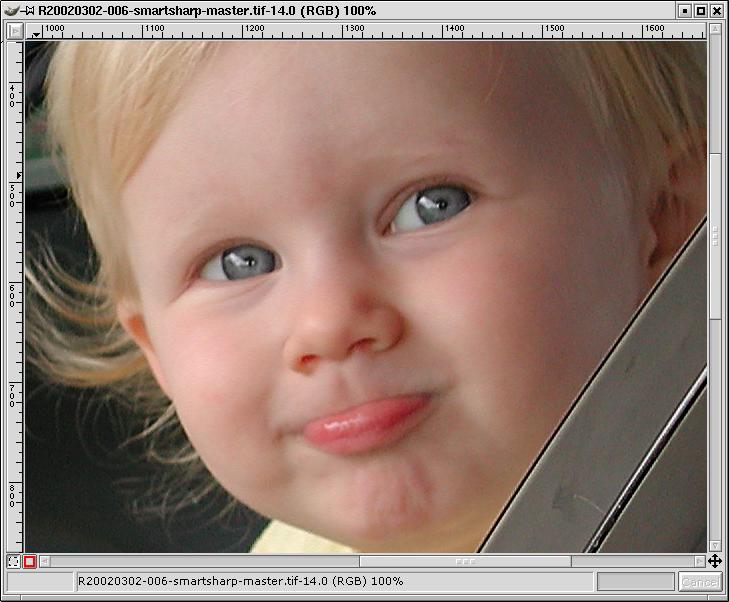
Smart sharpened, zoomed to 100%.
Compare the catchlights and the iris/chin/cheek edges.
Obviously this is a very preliminary and cursory examination, and further experimentation with the warp sharp script parameters is necessary before making any substantive judgements about the quality of warp sharping. What follows are my first impressions only.
In the noisy image, the smart sharpened image appears noticeably better to my eye than the warp sharpened image, at least viewed on screen and zoomed out. Noise is noticeably less visible.
On the less noisy image the results are not so clear cut. The two things that stand out to me in comparing the warp sharpened version to the smart sharpened version are that
More experimentation is necessary! For now, I am convinced that the warp sharpen script is a useful addition to the GIMP toolbox. Certainly as a convenience sharpening option it is unmatched: just run the script.
Here is a link to the script authors site. Download the script and put it into your .gimp-2.2/scripts folder. Restart GIMP and you should see warp sharpen as an option off of the “Alchemy” script-fu menu.
The original tutorial used to appear on gimpguru.