GIMP
News
Docs
Tutorials
More
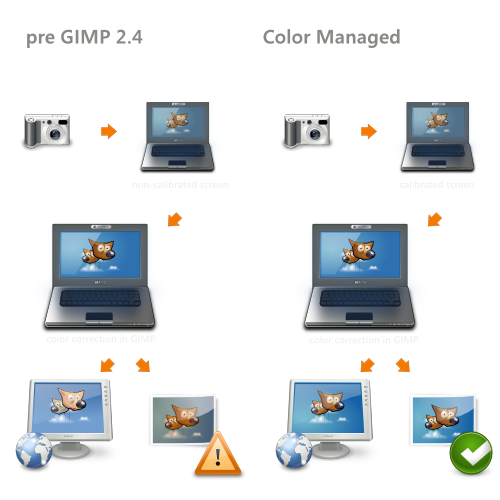
Many devices you use in your design or photography workflow, like digital photo cameras, scanners, displays, printers etc., have their own color reproduction characteristics. If those are not taken into account during opening, editing and saving, harmful adjustments can be done to images. With GIMP 2.4 this has changed: now you can have reliable output for both Web and print.

Most digital cameras embed a color profile to individual photo files without user interaction. Digital scanners usually come with a color profile, which they also attach to the scanned images.
When opening an image with an embedded color profile, GIMP 2.4 offers to convert the file to the RGB working color space. This is sRGB by default and it is recommended that all work is done in that color space. Should the user decide to keep the embedded color profile, the image will however still be displayed correctly.
In case for some reason a color profile is not embedded in the image and you know (or have a good guess) which one it should be, you can manually assign it to that image.
To get best results, you need a color profile for your monitor. If a monitor profile is configured, either system-wide or in the Color Management section of the GIMP Preferences dialog, the image colors will be displayed most accurately.
If you do not have a color profile for your monitor, you can create it using hardware calibration and measurement tools. On UNIX systems you will need Argyll Color Management System and/or LProf to create color profiles.
Using GIMP 2.4, you can easily get a preview of what your image will look like on paper. Given a color profile for your printer, the display can be switched into Soft Proof mode. In such a simulated printout, colors that cannot be reproduced will optionally be marked with neutral gray color, allowing you to correct such mistakes before sending your images to the printer.